
As our ASP.net website is in progress. Have you completed everything previously done? If not done Review our Education Panel and see the ASP tutorials from start. Then you are going great. In this article we will show you how to create unique identifiers for each user. You would have noticed that in the previous article. We did not insert of set any user ID. Now here we are going to set a unique ID for them.
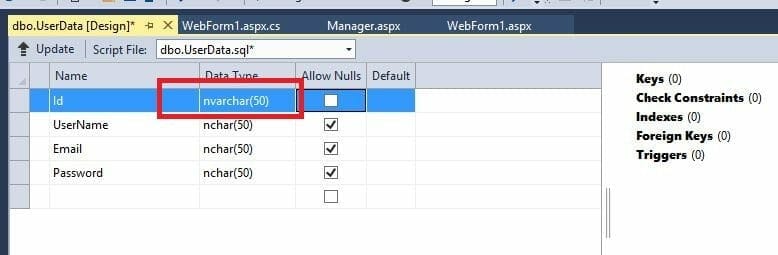
First you have to check that in database the type of ID must be nvarchar(50). If on any change it shows a warning message i will show you how to deal with it.
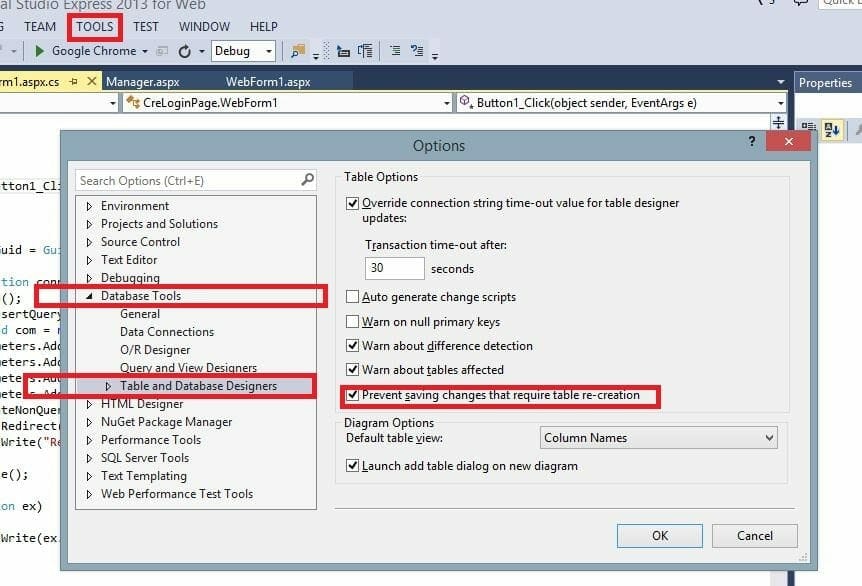
 Click the tool option then click options. After that you have to un-mark this line. Prevent saving changes that require table recreation. The use is quite simple. When you will make any change in the database it will not prompt any warning message.
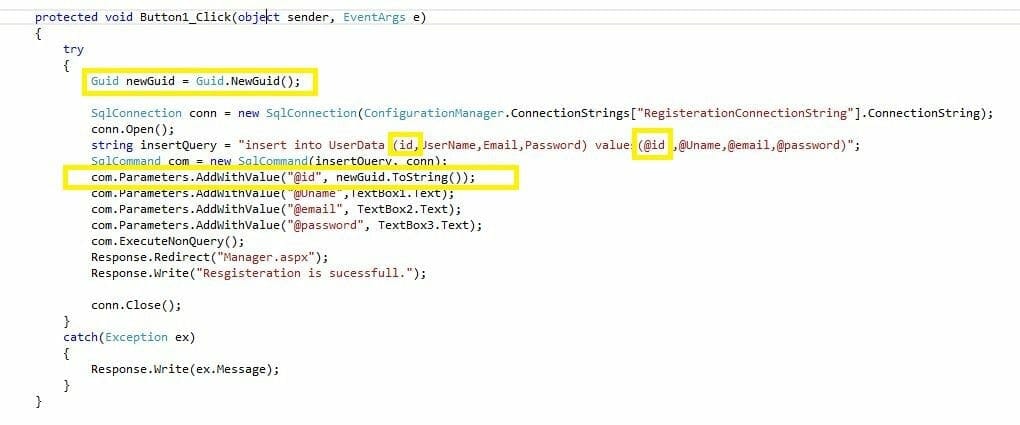
 Now you are done with the editing. Now you have to add code in the button section. Actually it will create a unique code as a user ID. For that we are using Guid. Make some changes in the code. Add the following lines highlighted in the picture.
 Now you are done with the coding part. Now execute it and enter the value in it.
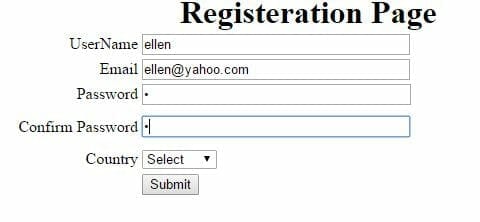 Now we have added some values in the form.Now lets see the result. As soon as you will press the submit button. You will see the unique code in the Id section.
 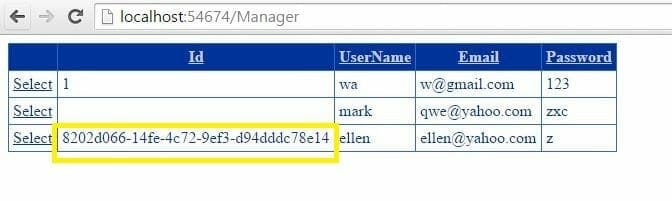 Here we are done with creating a unique identifier. Now i will soon update another article with the technique to validate username and password. Hope you find it easy. Don’t forget to subscribe us.
Article Written by Waleed Rashid. More info here.