
Hey guys, today i will show you an easy way to create a login page. Where you will take UserName and Password from the user. By using ADO it will check for the inserted values in the data base. If it will match. A message will be displayed. That the password is correct.
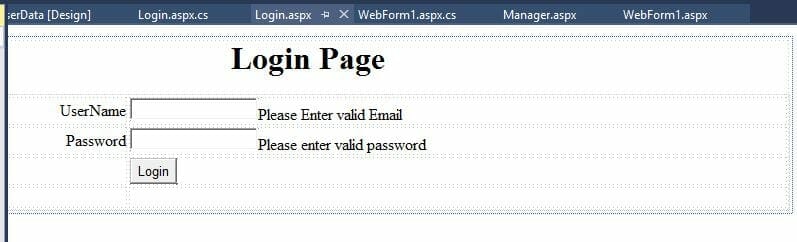
As we have gone through all the validation procedure. So i think its not necessary to define all the steps again. I ‘ve mentioned all the steps of using validation. So just click add a Webform to the project. And create this type of login form. Where you have to add Two textboxes and two required field validations. If you are still confuse how to do so. You can read the article How to Create a Login website – Validation Controls (Part 1) in ASP.net. All your confusions will be resolved. So you have to design it like this.
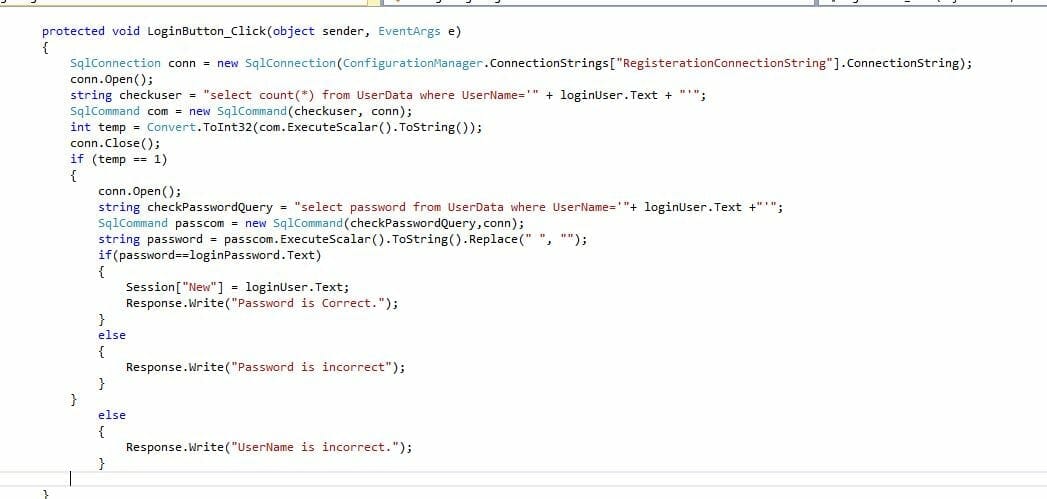
 Well this is how you form should look like. Now click the login button button. And open the code section of the web from. Now you have to copy the some lines of code from the previous section. But to keep it simple i ‘ve shown the whole code you have to write in this section.
Here we have first created a db connection. After that a query checks. Is the data is available in the db ? In the temp section a query is fetching the password from the database. According to the username. It will then match that password with the password entered by the user in the textbox. If both gets match it will write a message that the password in correct. Otherwise it will show that the user name is incorrect.
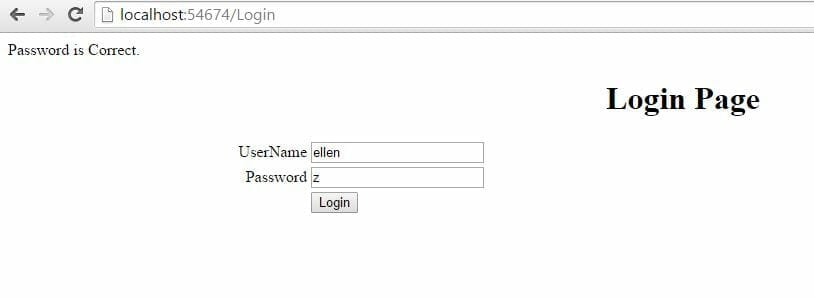
 Now i have entered the values in the login form here. In order to show you i ‘ve not hidden the password. As you can see we have previously registered the user named ellen. Now if we login with it. What’s the response ?
 Keep it up ! you have done with this. Now we will move on to create a user session. Here we are going to create a page on which user will navigate after login into the account. After that we will create hyper link where user can register itself.
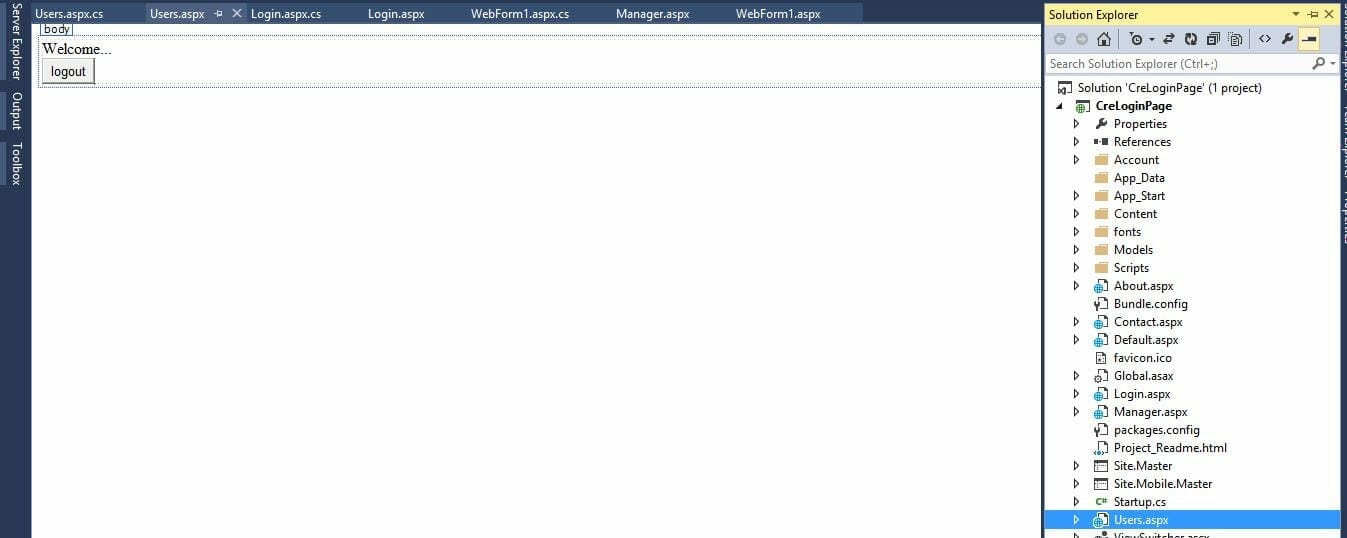
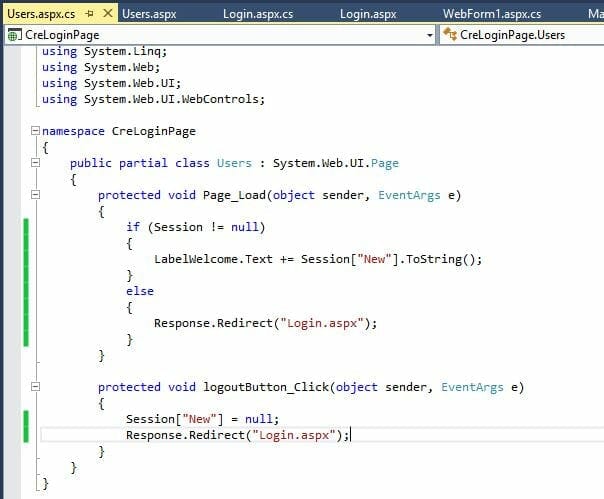
Now you have to add a webform in the project name Users.
Here right click the project and add new item then add a webform. Add a label and add a button on it. Welcome written is a label.
Now click the logout button and in the code section write this code. Here in the page load method we are writing the user name in the label. In the button method if user press the logout button it will redirect the user to login page.
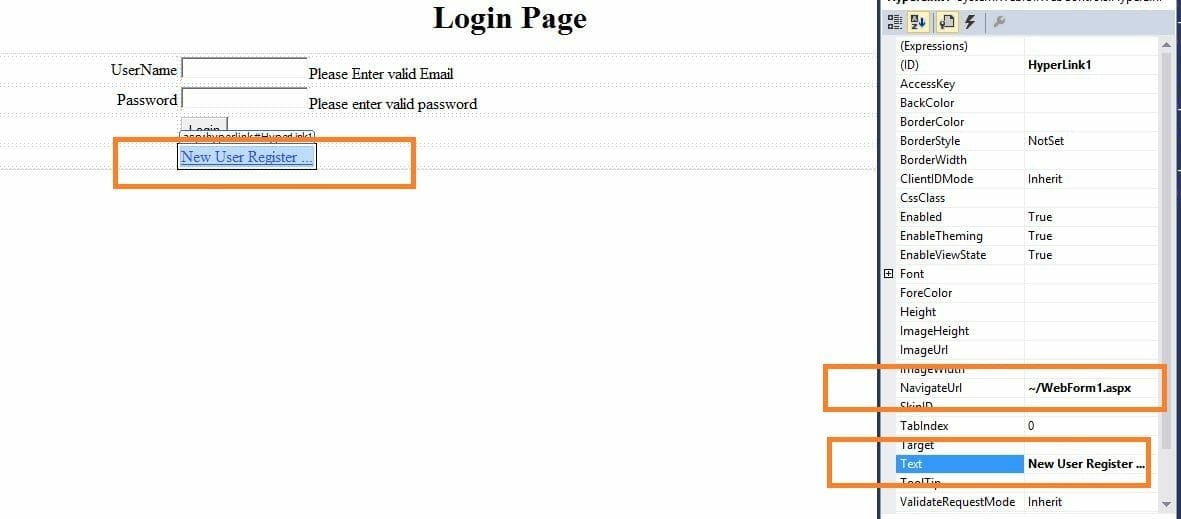
After that add a hyper link on the login form. And navigate it to the registration page.
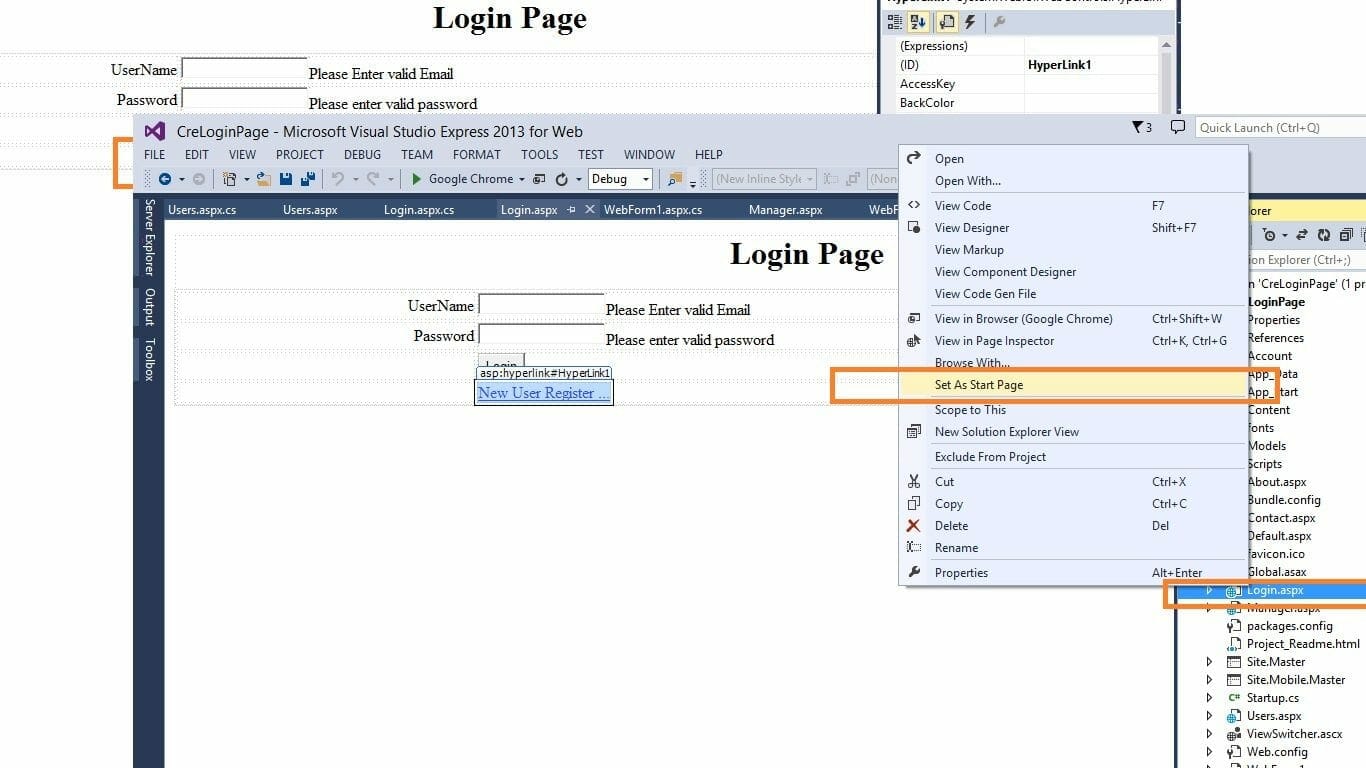
Now make the login page as a start page.
Now we are done with it. When you will execute it. It will show you a login page where you will enter user name and password else you can register yourself. If you have logged in you you will be redirected to a user page. And when you logout you will be redirected to the login page. Wohooo ! you are done with most of the development.
In the next article i will show you about the master pages and apply it to the existing pages.
Article Written by Waleed Rashid. More info here.