
Hell guys I’m here to demonstrate you about how to make your own API using Windows Azure in just 20 mins. Keep following the steps and you will end in by making your own API’s. You can sell it in market for others to use or use it for your own purpose. Before I begin to demonstrate you, I assume you are having an Azure account. If not then I would recommend you to sign up for free on Windows Azure and enjoy free one month trail period. You can click here to sign up for free.
The thing which we are going to learn is quite amazing cause making API’s is considered as one of the most difficult task and a lot of us are not able to make the desired applications cause we don’t have API’s or we are not able to make our own API’s for our services. But from now on, each and everything would be on your tips on How to make your own API using Windows Azure. So let’s start and first login to your Azure Account.
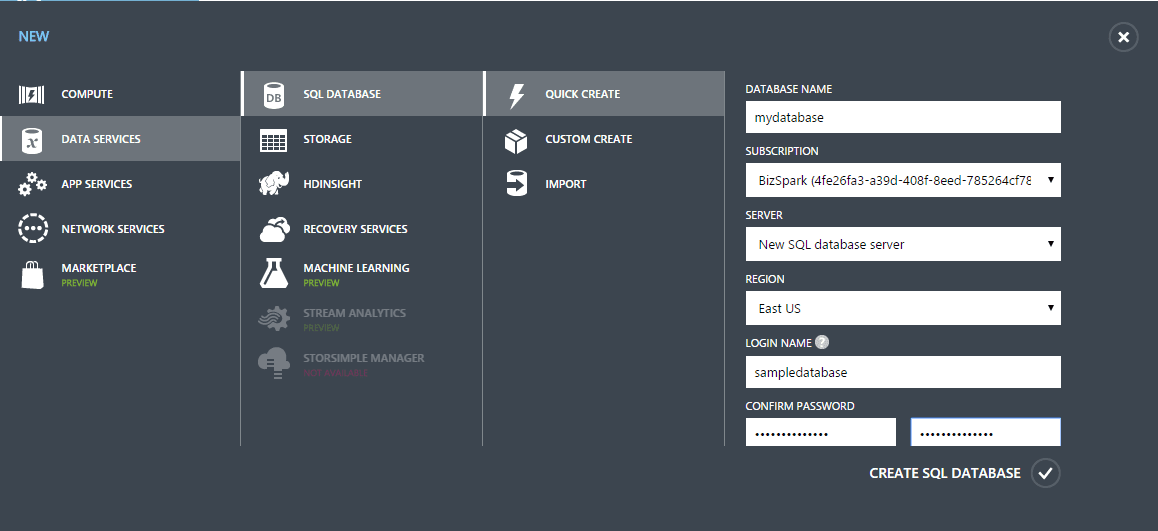
Step 1: Click on NEW that is popping up on the bottom left of your screen.
Step 2: Select Data Services followed by SQL Database then Quick Create. Now give your database a name, select a New SQL database server, select a region and lastly give a login name and password. It would be required in step ahead.
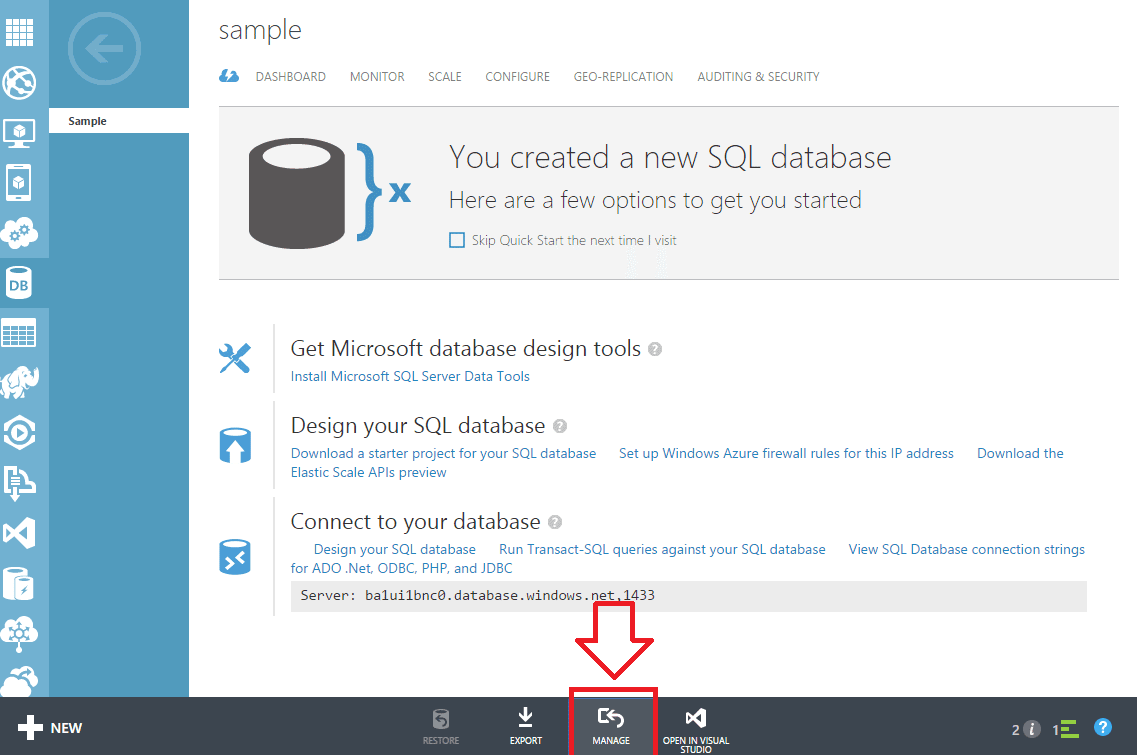
Step 3: After Successful creation of SQL Database now click Manage.
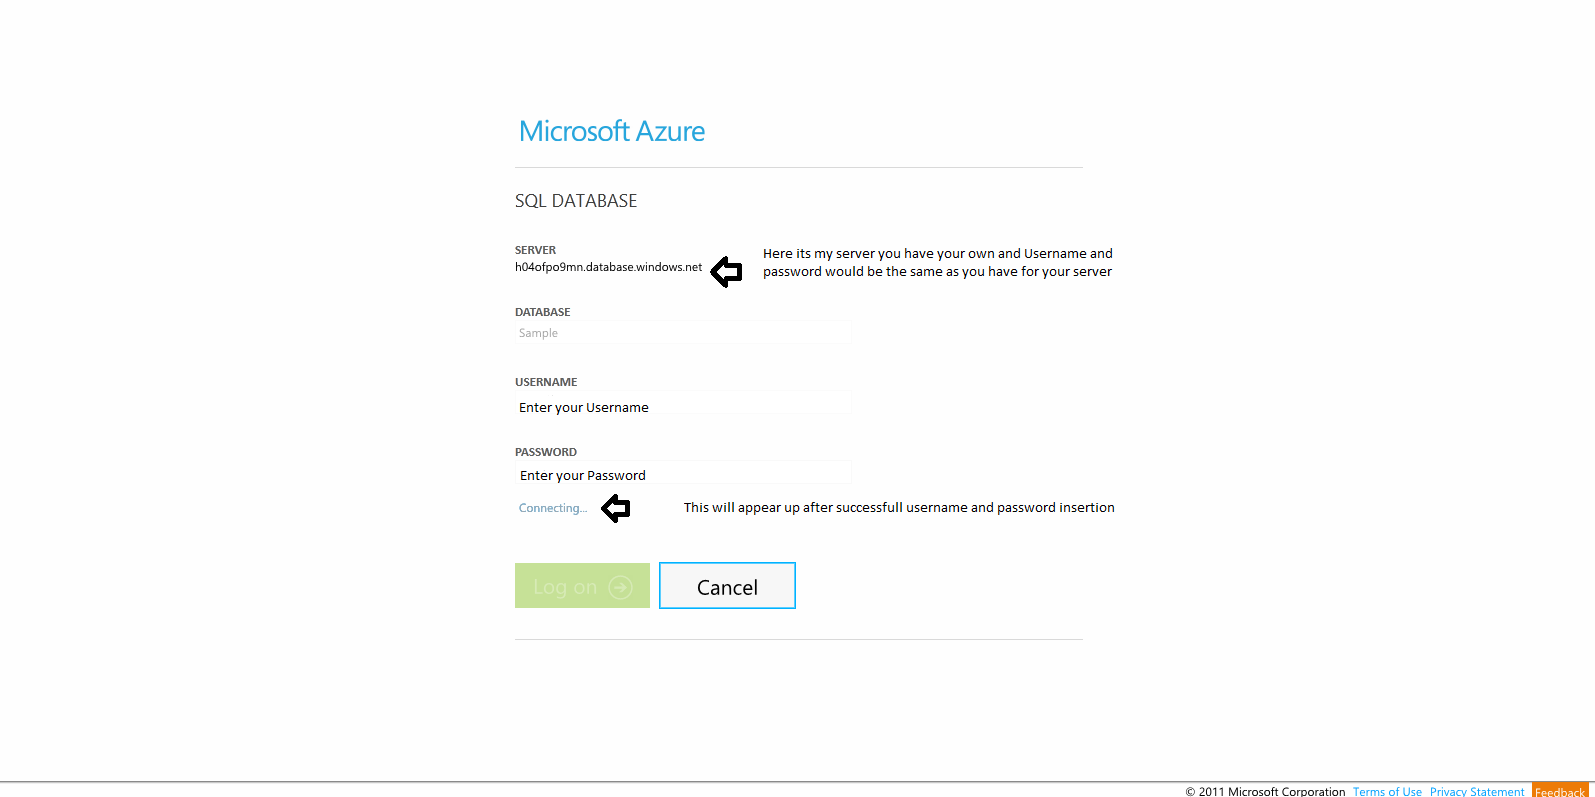
Step 4: After you have click Manage a new Page will open up as shown below. Enter the Username and Password here that you gave in first step and click log on. This step will take few mins to login to the account.
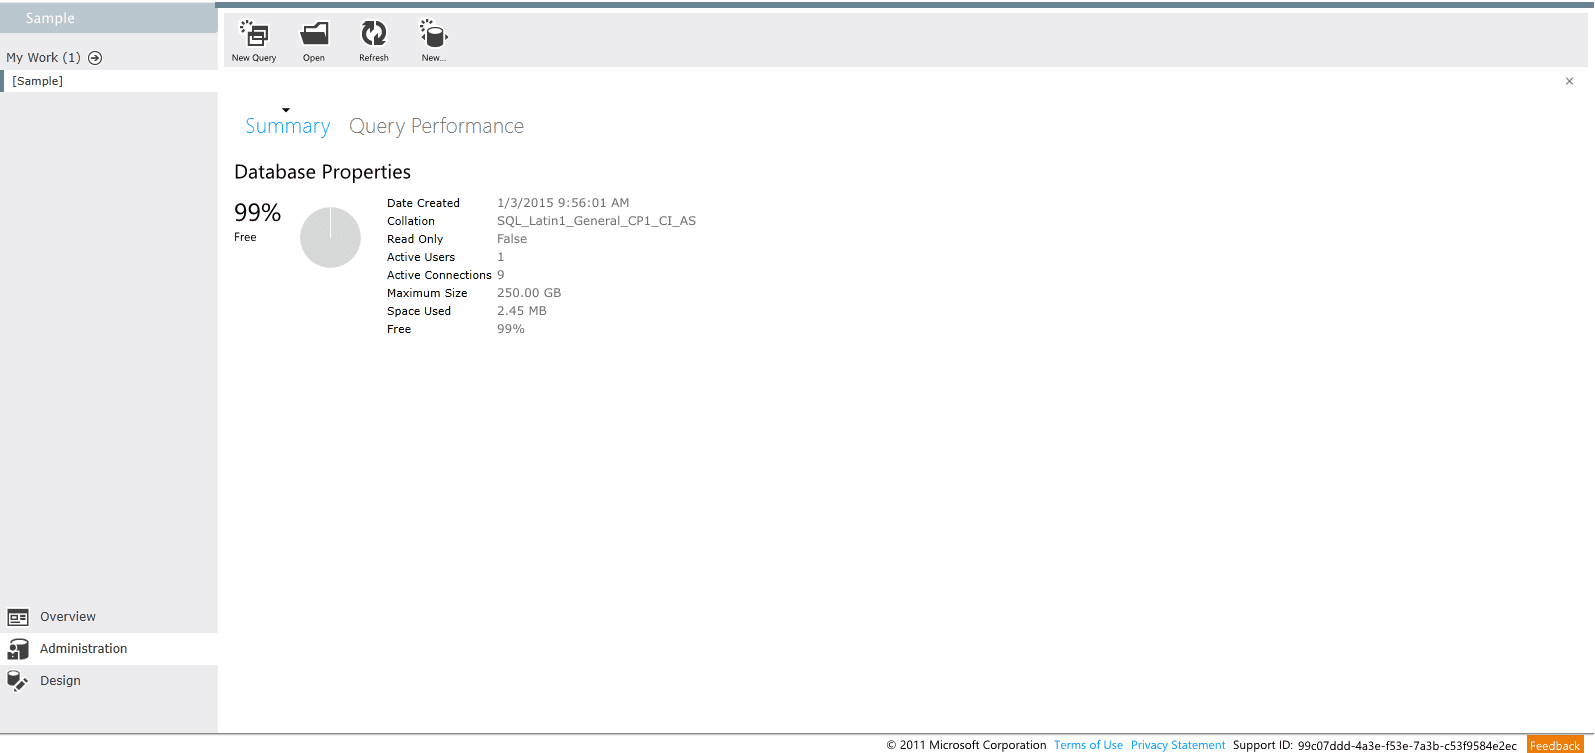
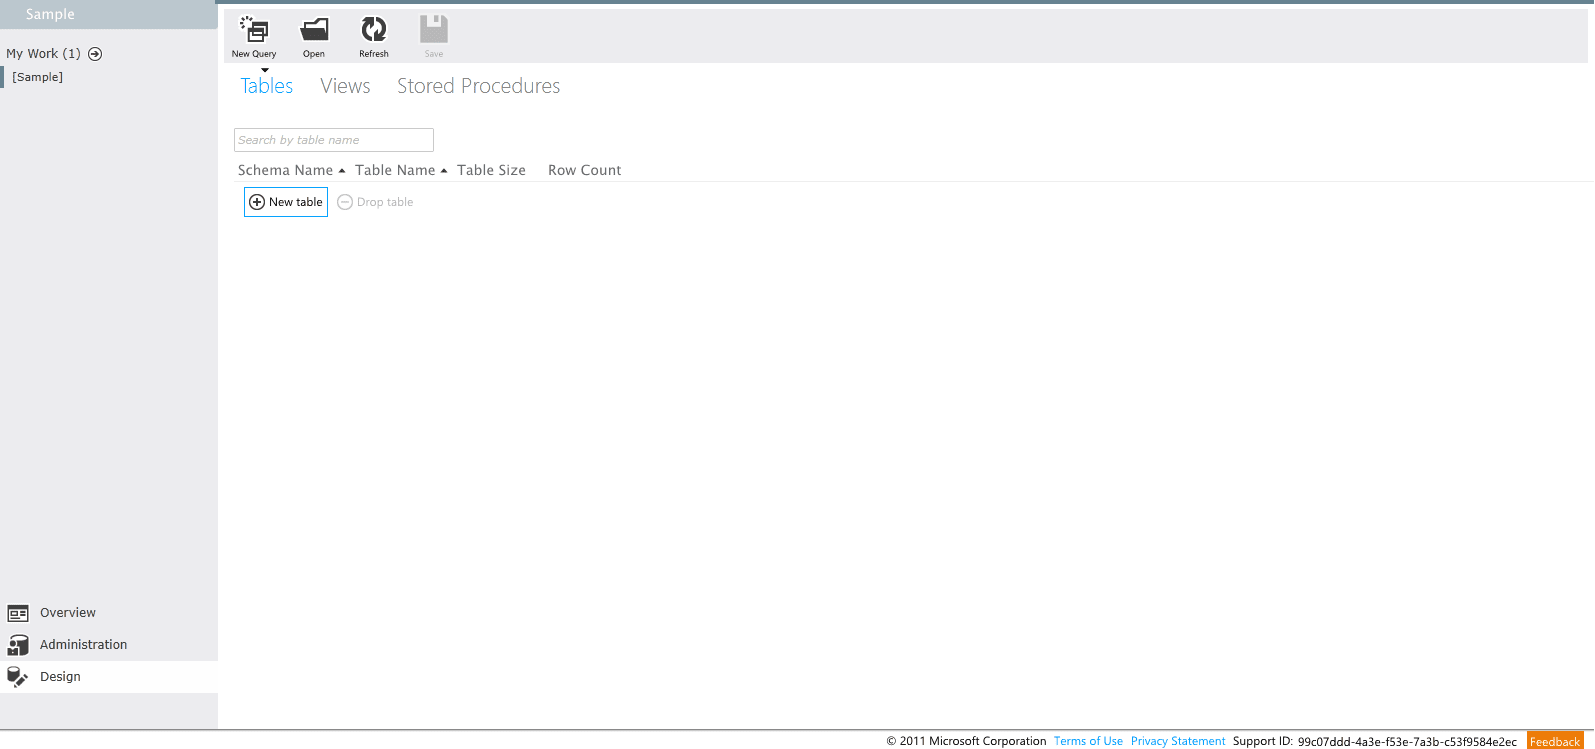
 Step 5: Now as you are logged in to your SQL Database it would some how look like this.
Step 6: Now Click on Design present on bottom left and then click New Table as shown below.
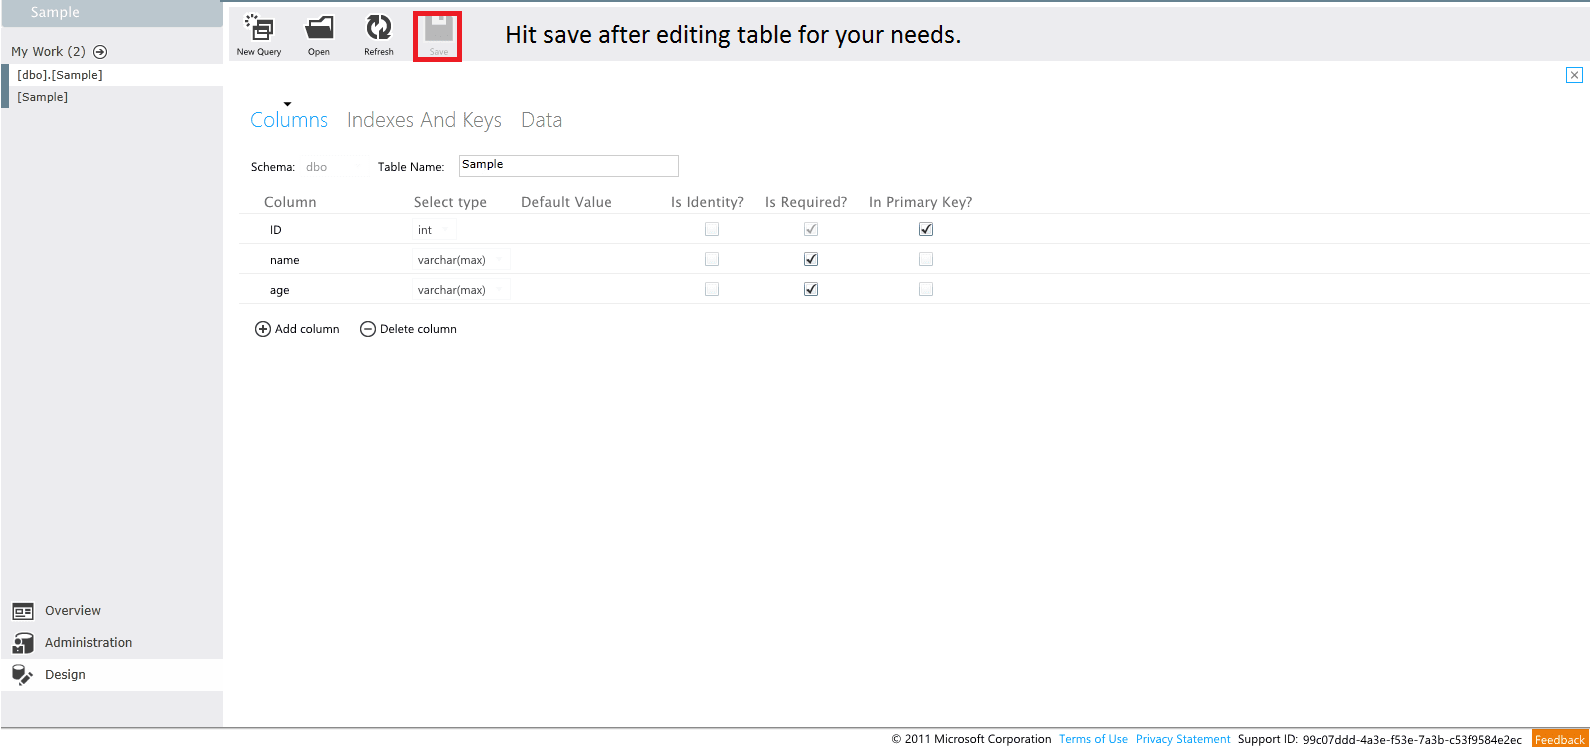
 Step 7: Now specify the data you want to have in the table (Here I have a ID, name and age) and then click save.
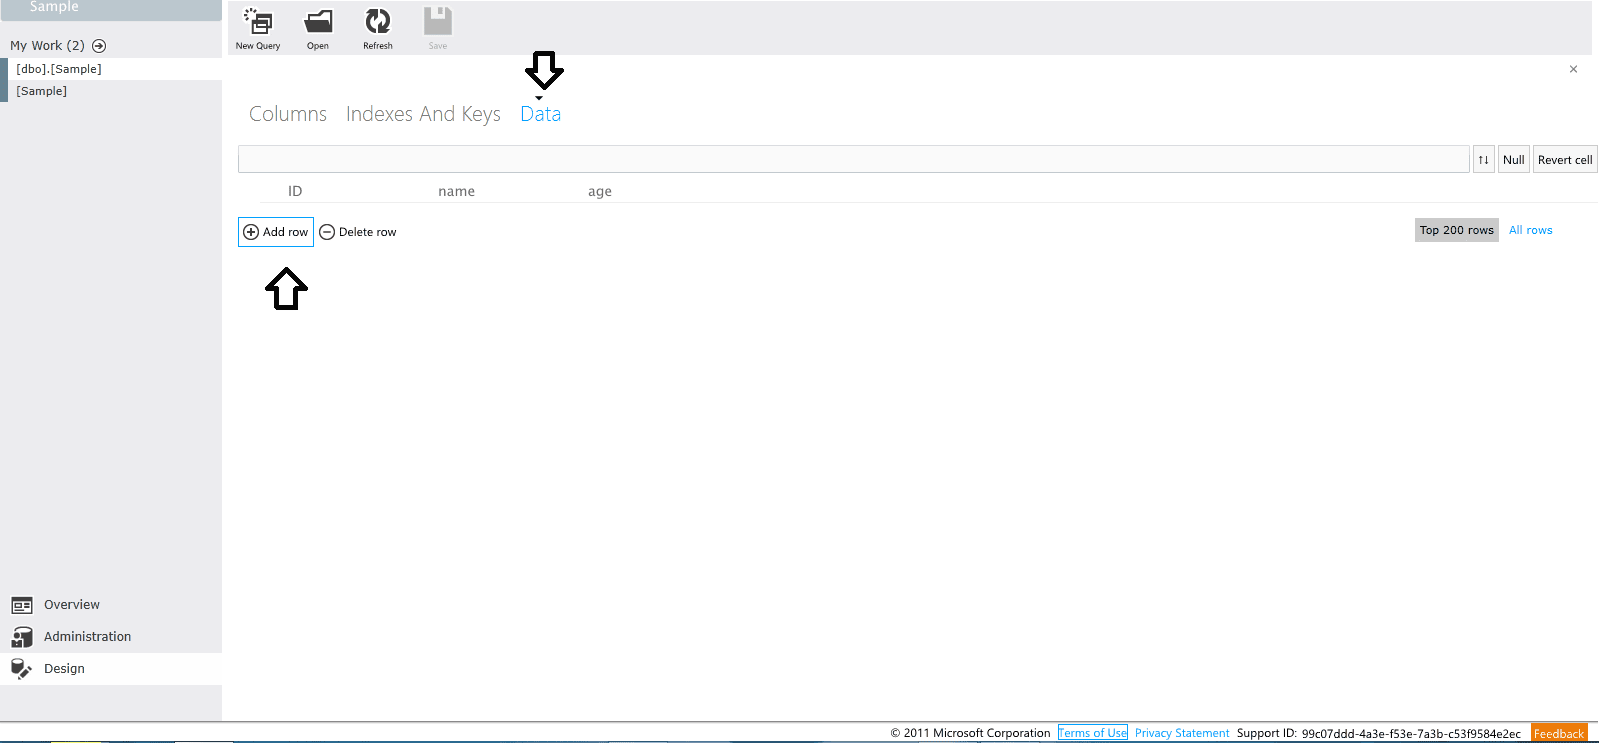
 Step 8: Now go to the Data tab and click add new row.
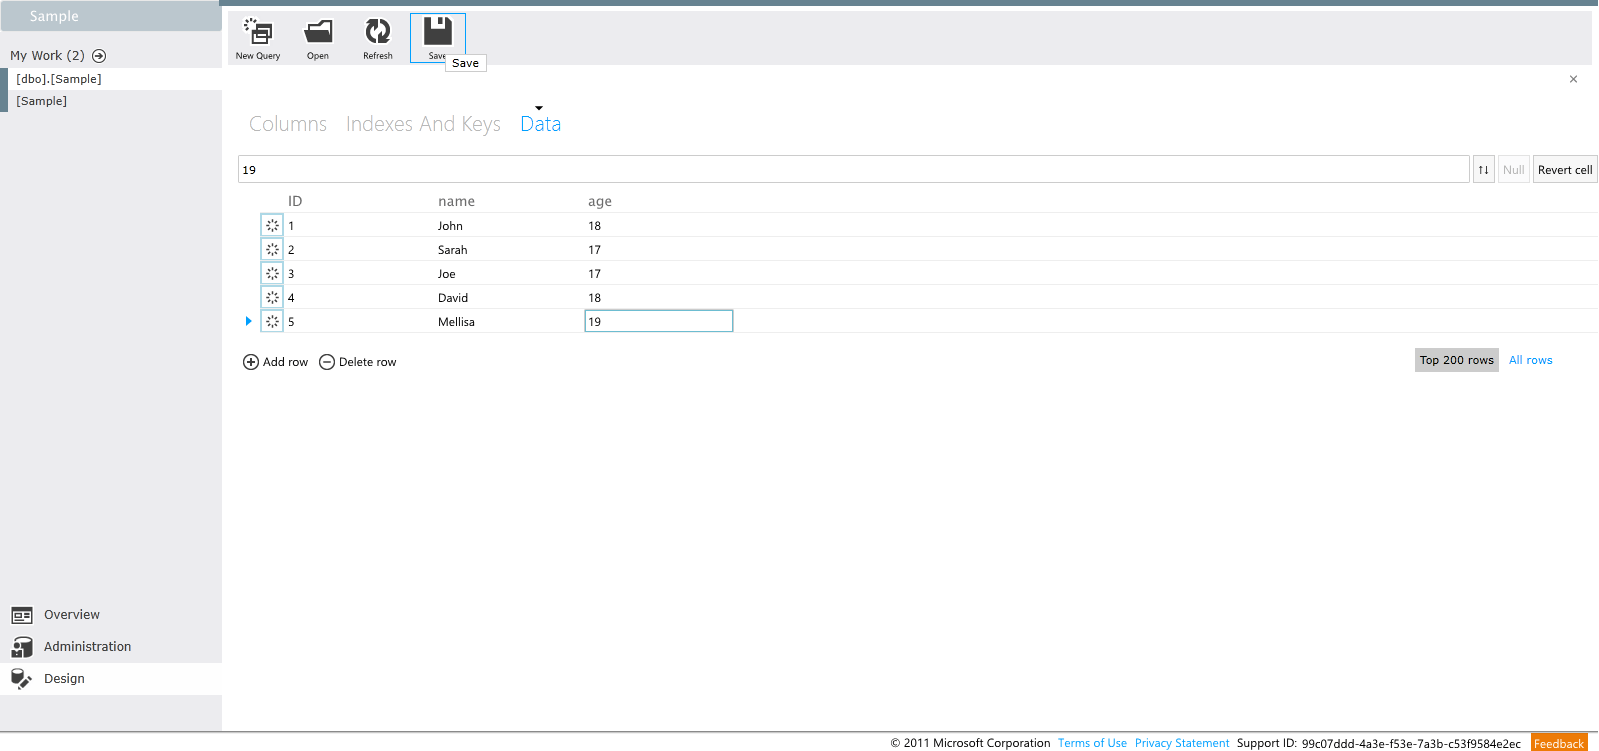
Step 9: Now add values into the row and create 4 to 5 rows. After that click Save.
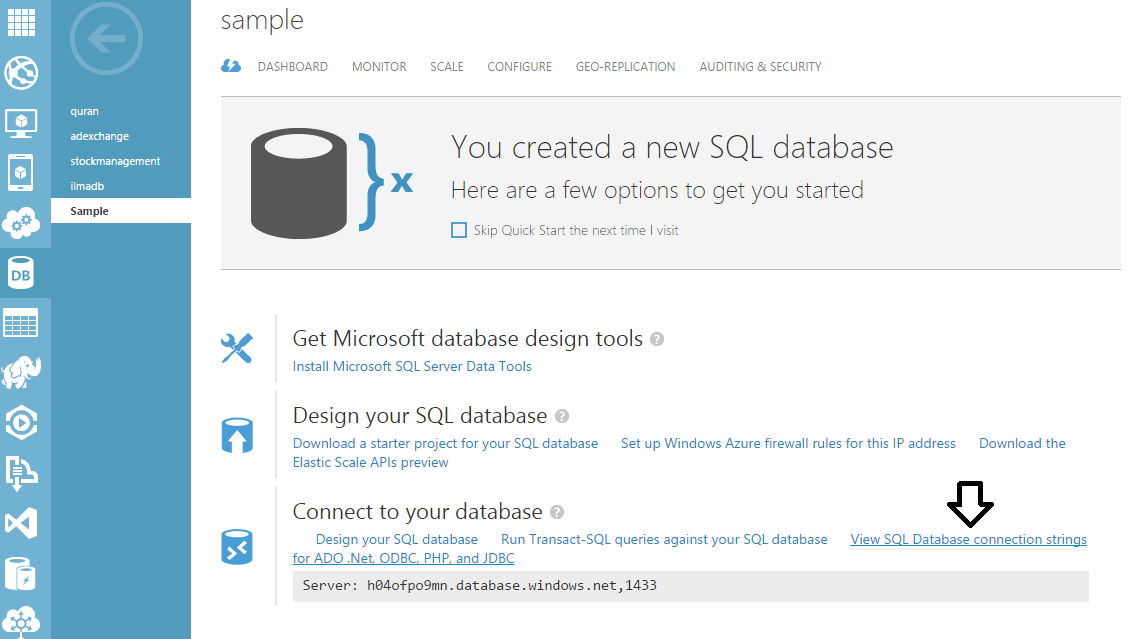
 Step 10: Now move back to Azure portal click on the database you created and there click View SQL Database connection strings.
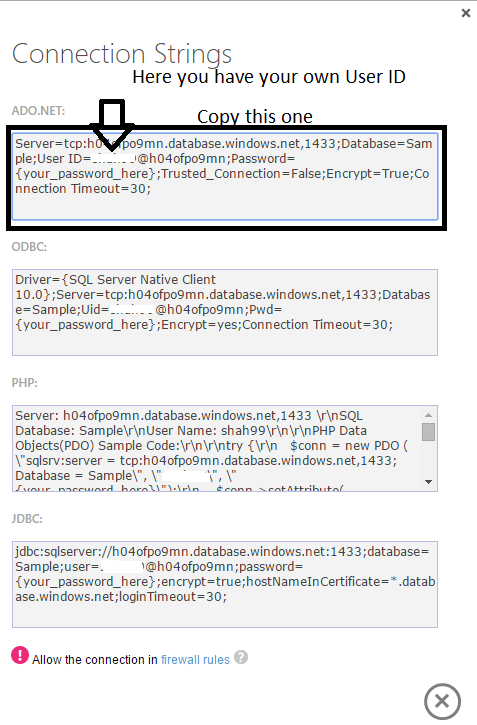
 Step 11: After clicking the View SQL Database connection strings copy the ADO.Net connection string. Dont forget to enable firewall rules for your system.
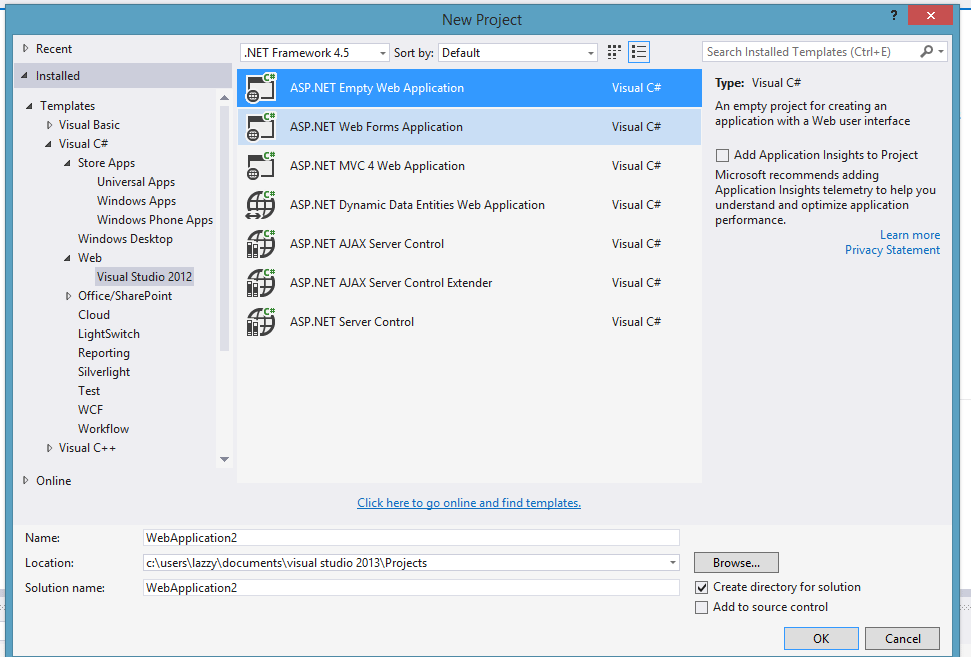
 Step 12: Open Microsoft Visual Studio 2013 (Note: Update 2 or higher required) and Create an Empty ASP.NET Empty Web Application Project.
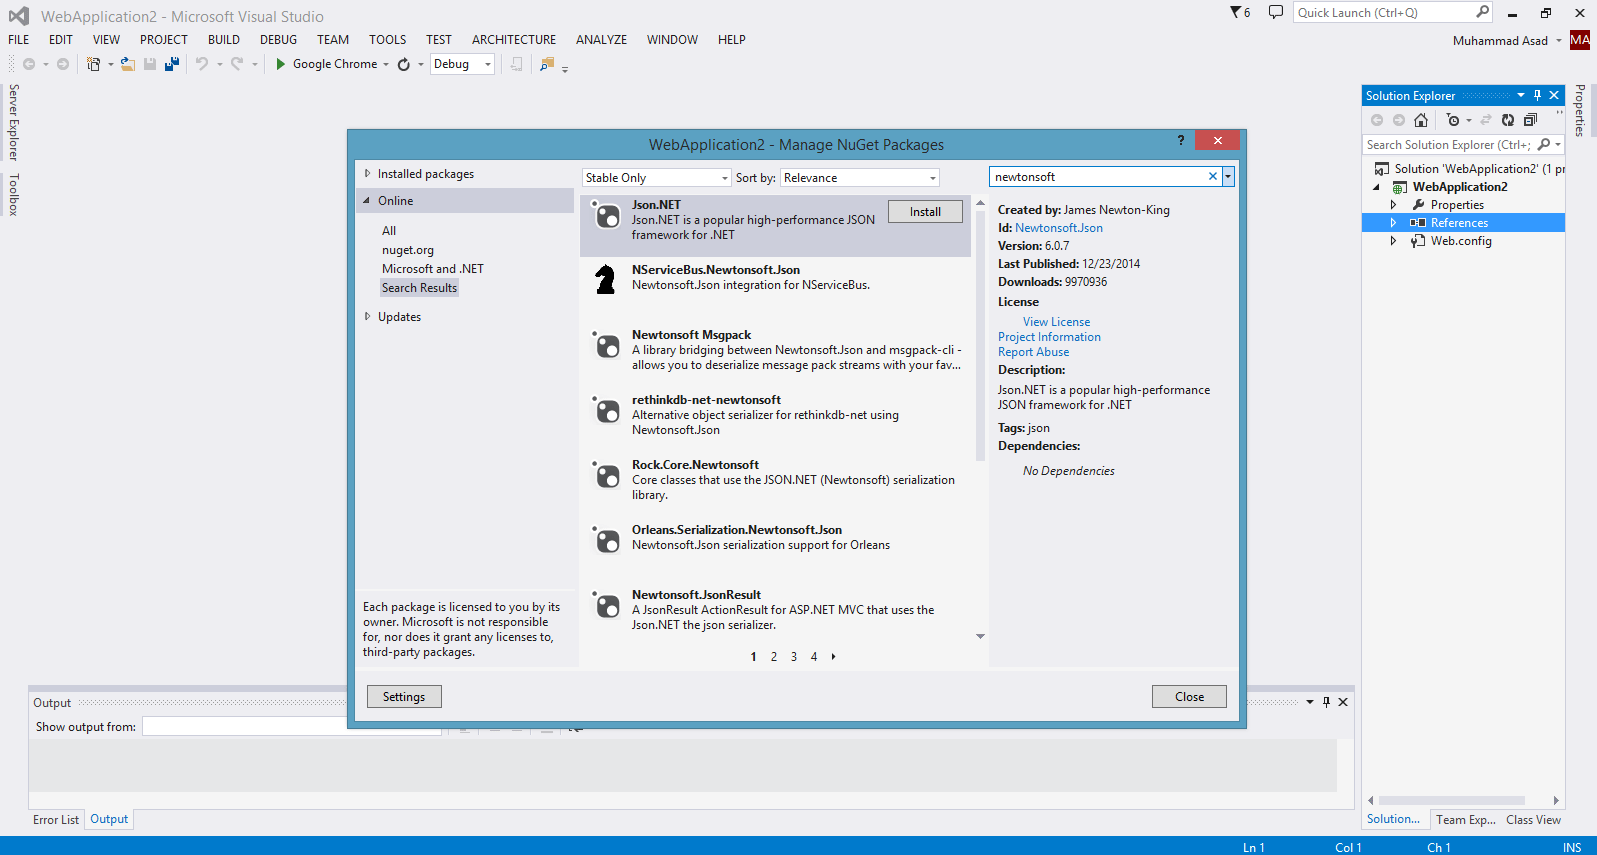
 Step 13: After the project is open Right Click on references and then Click on Manage Nuget Packages. After that install Json.net.
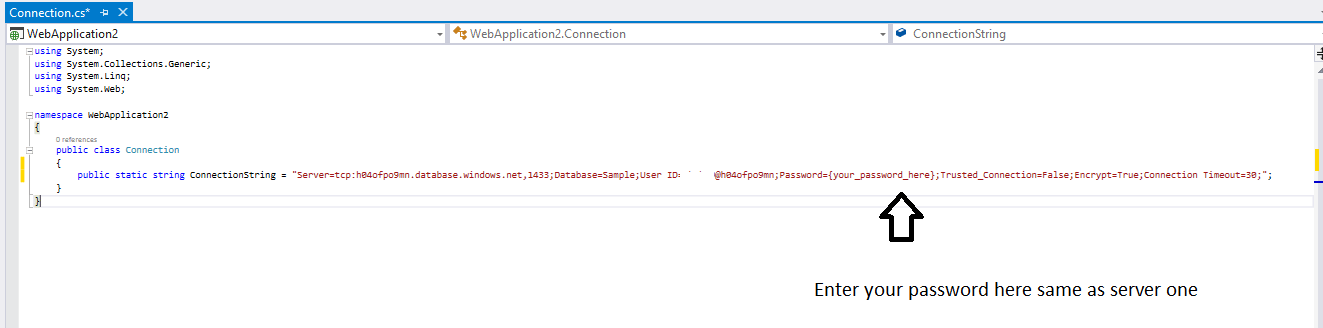
 Step 14: Add a new class to the project name it as Connection and add following code to it.
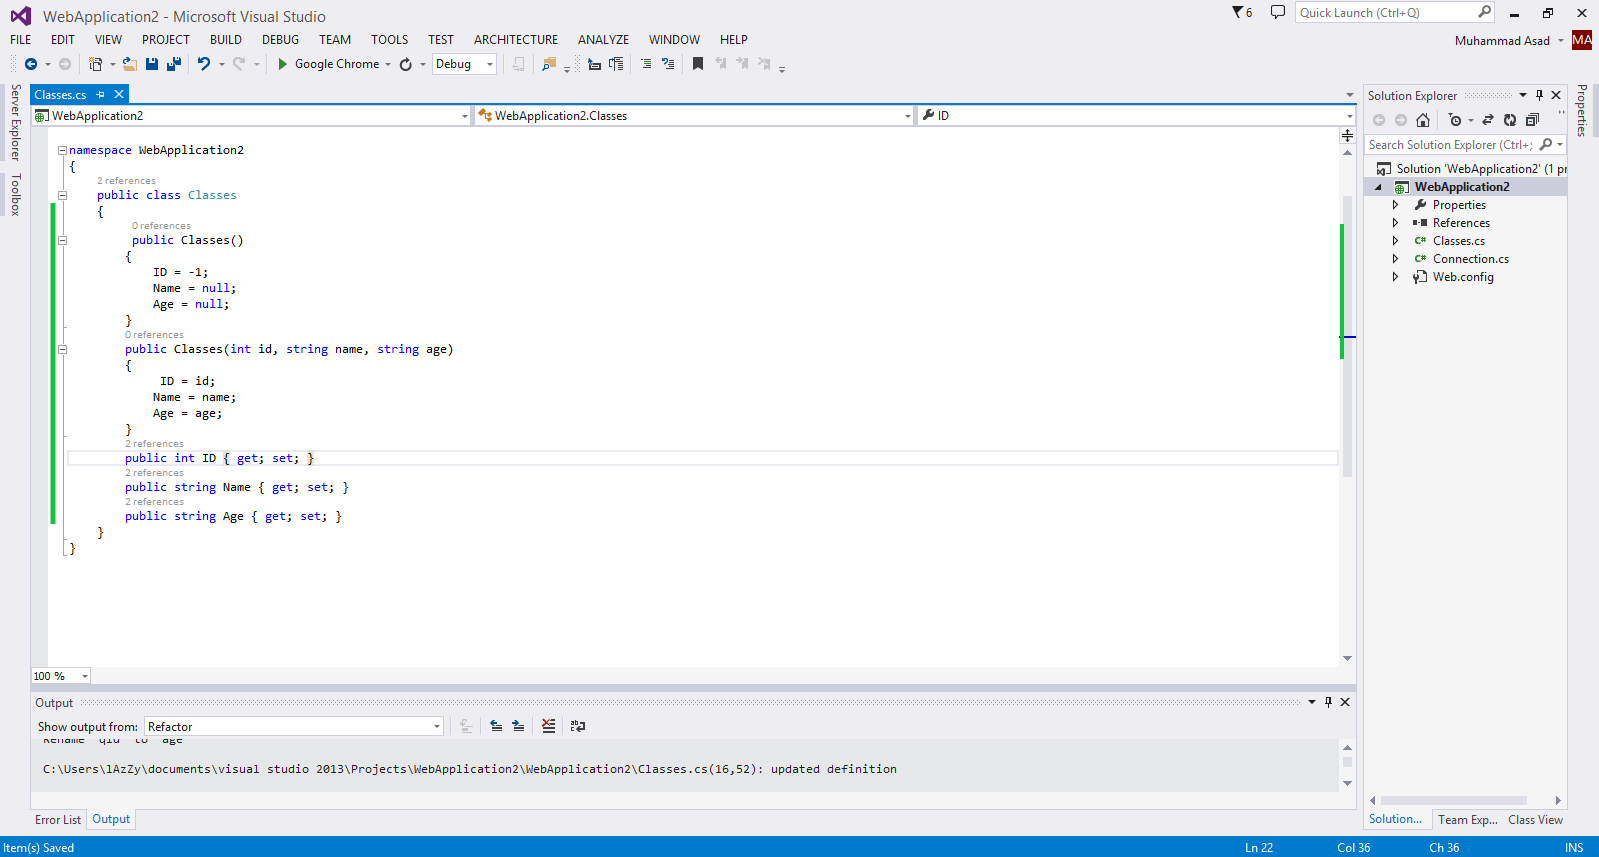
 Step 15: After that add another class I have named it just Classes.cs and add code according to your requirement as here in the picture below.
 Step 16: Add the following code after the Classes class.
public class ClassesData
{
public List<Classes> ListofData = new List<Classes>();
}
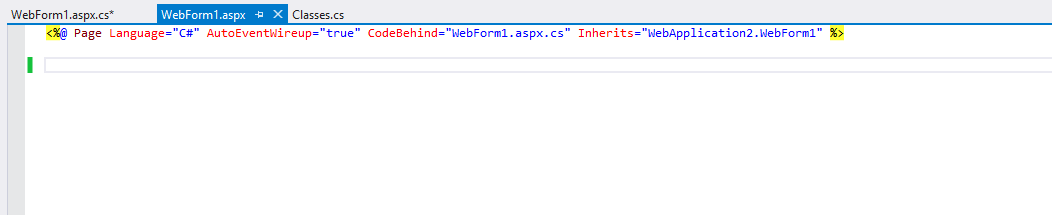
Step 17: Add a new WebForm to the project and Delete all the text in the WebForm.aspx file except the first line as shown below.
 Step 18: Now add the following code in Webform.aspx.cs file and then run it.
ClassesData data = new ClassesData();

        string key = null;

        protected void Page_Load(object sender, EventArgs e)

        {

            key = Request["key"];

            if (key == "yourapikey")

            {

                Load();

            }

            else

            {

                data.ListofData = null;

                Response.Write(JsonConvert.SerializeObject(data));

            }

        }

        public void Load()

        {

            SqlConnection connection = new SqlConnection(Connection.ConnectionString);

            try

            {

                connection.Open();

                SqlCommand readcommand = new SqlCommand("SELECT * FROM Sample", connection);

                SqlDataReader reader = readcommand.ExecuteReader();

                if (reader.HasRows)

                {

                    while (reader.Read())

                    {

                        data.ListofData.Add(new Classes(Convert.ToInt32(reader["ID"].ToString()), reader["name"].ToString(), reader["age"].ToString()));

                    }

                    Response.Write(JsonConvert.SerializeObject(data));

                }

                else

                {

                    data.ListofData = null;

                    Response.Write(JsonConvert.SerializeObject(data));

                }

                reader.Close();

                connection.Close();

            }

            catch (Exception ex)

            {

                data.ListofData = null;

                Response.Write(JsonConvert.SerializeObject(data));

            }

        }
Step 19: Something like that would happen as shown below.
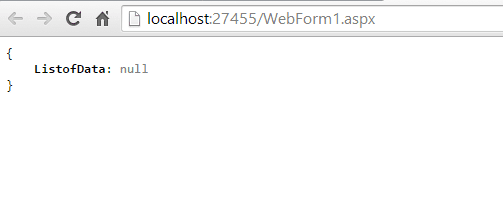 Step 20: You missed one thing, in the url above give your api key like shown below.
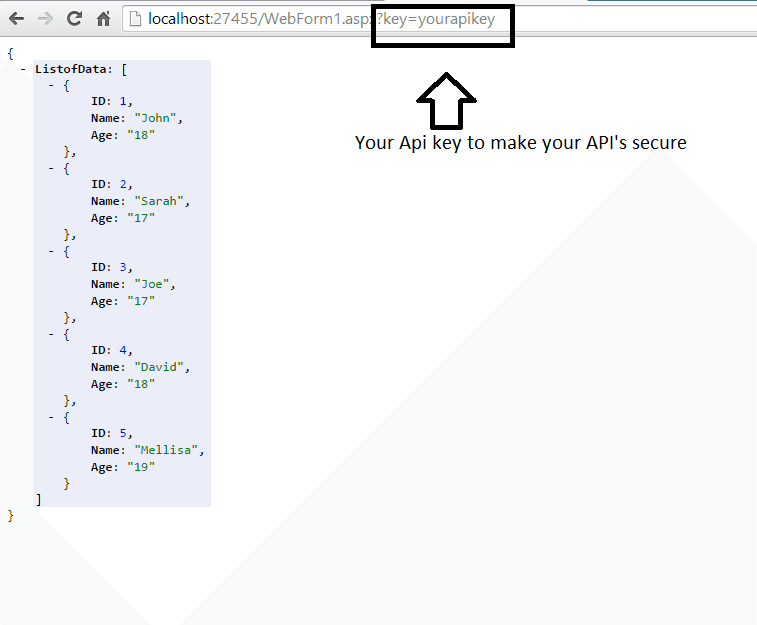 Now you have your own API’s to work with and now you can make your own API’s really quick.
Isn’t it amazing you can now make API’s for your own services or you can make API’s for different firms in no time and charge them as much as you want cause making API’s is one of the most difficult task. Larger Organizations have separate departments who just work on their API’s.