
After much anticipation, the newest Android version, Android Oreo on the Samsung Galaxy S8/S8+ is finally here. The Samsung Galaxy S8/S8+ was released in April last year as the company’s flagship device. The device took the Android market by storm with its bezel-less display, lightweight and an abundance of features, all packed into a very thin form factor. The Samsung Galaxy S8/S8+ came installed with the latest Android OS at the time which was the 7.0 Nougat version of Android. However, after almost a year it is time for the next version of Android to hit the smartphones.
Android Oreo on the Samsung Galaxy S8/S8+ brings many new features to the Android experience. Some of which are: Picture-in-picture mode, notification channels, background app optimizations, notification snoozing, and more. Besides the new Android features, there are some other new features that are Samsung-specific such as a new keyboard with stickers and GIFs built in, the App Pair feature from the Samsung Galaxy Note8 and many more.
The build also comes with latest February security patches so you don’t have to worry about any major security vulnerabilities like BlueBorne, KRACK, and Spectre/Meltdown.So, all of that sounds good and you want to go ahead an install the latest Android update on your Samsung Galaxy S8/S8+? Well, you are in luck, thanks to the good people over at xda-develpers.com, who were able to pull the update which allows you to install it via the stock recovery.
In this guide, we will show you step by step how you can install Android Oreo on the Samsung Galaxy S8/S8+ Exynos.
However, before proceeding, a word of caution:
If your phone is currently running Android Nougat, then this should go smoothly. However, if your phone is running one of the Android Oreo betas, then following this method will require a factory reset/data wipe. We recommend backing up important data regardless. You can easily backup your data using this guide without any root in 5 minutes.
How to Install Android Oreo on the Samsung Galaxy S8/S8+ (Exynos)
Step 1 – Check Phone’s model number
It is very important that the model number of your phone be either G950F (Galaxy S8 Exynos) or G955F (Galaxy S8+ Exynos). Currently, these two models are the only ones that can flash the Oreo build. If you do not have either of these models, do not proceed.
Step 2 – Download required files
If the model number of your S8 is G950F then download these files: AQL5 Odin and AQL5 to CRAP. If you have a G955F model then download these files: AQL5 Odin, AQL5 to ZRA5, and ZRA5 to CRAP.
Step 3 – Copy the files
Now copy the OTA file that downloaded in the previous step onto the SD Card on your phone. If you don’t have an SD Card, don’t worry as you can skip this step but you will still need the OTA file on your computer.
Step 4 – Extract Odin
Extract the Odin firmware linked in the second step. It will be in a zip format.
Step 5 – Reboot
Power of your device and then reboot it into download mode by holding the Bixby button + Volume down + power.
Step 6 – Download Odin
Plug your phone into your computer. Download the Odin tool from here. Odin is an official Samsung flashing tool that can flash official Samsung firmware onto Samsung Galaxy phones. You will see 5 sections on the right side of Odin, but only 4 of those will be used.
Step 7 – Selecting the relevant files in Odin tool
Go to the firmware file that you downloaded earlier and extract the files into a folder. Now open the Odin tool and click the BL button that you see in Odin tool. Navigate to your Odin firmware folder where you extracted your files, and then click the file starting with BL. Do the same for AP, CP, and HOME_CSC. See the image below for further help

Step 8 – Click start
Click start at the bottom of Odin.
Step 9 – Wait for flashing to complete
let the flashing process complete. Once its done your device will reboot. As soon as it reboots, power of your phone again and then boot into recovery once more by pressing and holding down the Bixby button + Volume up + power.
The next steps will differ depending on what model you have. Please proceed to the right set of instructions for your particular model.
Samsung Galaxy S8 (G950F)
Step 10- With SD card
After making sure that you have the model G950F. Select “apply update from SD card” if you have an SD card in your S8. You can select this option by moving up and down using the volume rocker on your device. Use the power button to select. After selecting that option, find the file called “update.zip” and select it with the power button.
Step 11- Without SD card
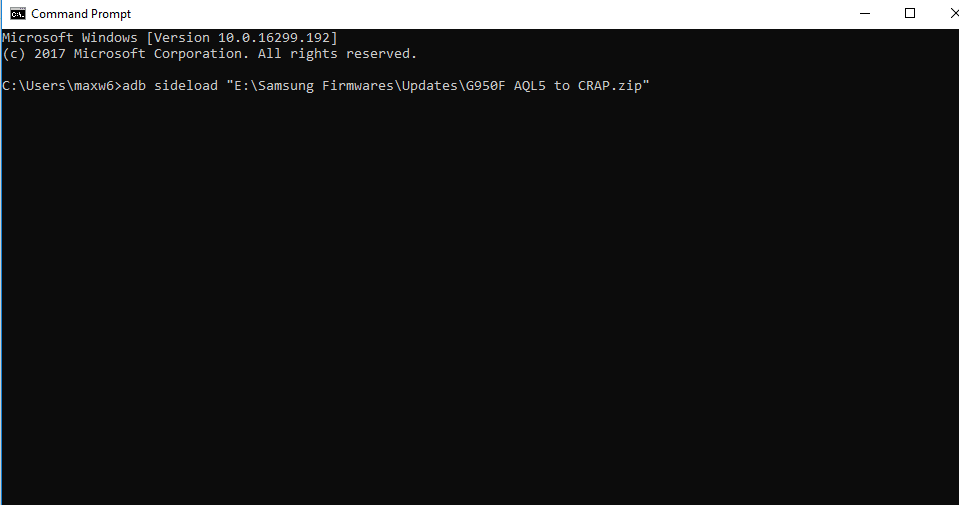
If you don’t have an SD card, select “apply update from ADB” and then on your computer open a command prompt by pressing Windows key + R and typing “cmd.” Once this command prompt opens up, type adb sideload <path to file update.zip> and hit enter.
If you don’t already have ADB set up, then you can follow these quick set of instructions to set up.
Install Android Oreo on Samsung Galaxy S8+ (G955F)
Step 10 – With SD card
After making sure that you have the model G955F. Select “apply update from SD card” if you have an SD card in your S8. You can select this option by moving up and down using the volume rocker on your device. Use the power button to select. After selecting that option, find the file called “G955F AQL5 to ZRA5.zip” and select it with the power button.
Wait for your phone to reboot then it will be running Android Oreo beta 6. Now to get to the official Android Oreo release, power off your phone again and reboot into recovery by holding the Bixby button + Volume up + Power and selecting “Apply update from SD card” then select the file “G955F ZRA5 to CRAP.zip”. This will install it on your phone and you will be running official Android Oreo!
Step 11 – Without SD card
If you don’t have an SD card, select “Apply update from ADB”.Then on your computer open a command prompt by pressing the Windows key + R and typing “cmd.” Then, enter the following command in the command prompt.
adb sideload <path to file G955F AQL5 to ZRA5.zip>
Step 12 – Without SD card Continued
If you don’t have an SD card, wait for your phone to reboot and then it will be running Android Oreo beta 6. To get to the official 8.0 Oreo release, power off your phone and then reboot into recovery again by holding Bixby button + Volume up + Power. Then select “Apply update from ADB.” Finally, in the command prompt type
adb sideload <path to file G955F ZRA5 to CRAP.zip>
AAnd there you have it. Congrats! Now you have the official release of Android Oreo on the Samsung Galaxy S8/S8+. Your device will be able to accept official OTA updates in the future, and KNOX will be intact too. Enjoy!
Let us know how you feel about Android Oreo in the comments below.