The Google Pixel 3 was released almost a month ago and ever since it has been in the spotlight of countless tech articles. The phone not only provides some of the best hardware, especially the camera, but also has some very cool software features that are sadly exclusive. However, thanks to the modding community, modders have managed to port many of the camera’s software-based features on to the previous Pixel phones. Today, we have another breakthrough, now you can also enable Google Pixel 3 Call Screening Feature on your Pixel 2 and Pixel phones.
How to enable Google Pixel 3 Call Screening Feature on Pixel 2 and Pixel
Google Pixel 3 call screening feature lets you avoid telemarketers and scammers. Say you receive a call and have no clue who it is, then simply hit the call screen button and Google Assistant will pick up the phone for you. Google Assistant will then ask the caller to state their name and the reason for the call. Most telemarketers would hang up by then.
This nifty little feature is exclusive to Pixel 3 just like the many camera features, however, thanks to Xdadeveloper senior member coolsid8 the feature can now be enabled on Pixel 2 and Pixel.
However, there is a catch, you need to have a rooted Pixel or Pixel 2 smartphone and you need to be in the USA for it to work.
Let’s get right into it
Disclaimer: this method is not guaranteed to work. Many users reported that it doesn’t work yet on the stock ROM, but some found success with version 24 of the app and version 14.5.70 of Google Play Services. Some people only got it working on custom ROMs, too. We can’t pinpoint the exact requirements for enabling this feature yet, but we’ll try to update the article as soon as we have new details.
Step 1- Start off by rooting your device if you already haven’t.
Step 2- Now you need to download any root-enabled file explorer such as FX File Explorer or MiXplorer.
Step 3- Open the file explorer and navigate to the root directory of your phone from the left-side navigation menu.
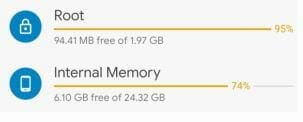 Root Directory
Step 4- Navigate to /data/data/com.google.android.dialer/shared_prefs and then look for the file named
dialer_phenotype_flags.xml.
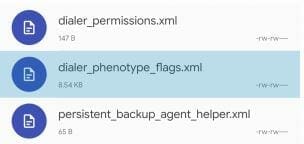 Dialer phenotype flags
Step 5- When you are inside the file, Look for
__data_rollout__SpeakEasy.CallScreenOnPixelOneAndTwoRollout__launched__
and change the value from ‘false’ to ‘true’. You can use the Find feature in the text editor to save yourself the hassle.
 Change value
Step 6- Now you need to look for the following
__data_rollout__SpeakEasy.OverrideUSLocaleCheckRollout__launched__
and change the value from ‘false’ to ‘true’. You can again use the Find feature in the text editor like before.
 Data Roll Out
Step 7- Now search for
G__enable_speakeasy_details
change the value from ‘false’ to ‘true’.
 Speak Easy Details
Step 8- Now search for the following
G__speak_easy_bypass_locale_check and change the value from ‘false’ to ‘true’. You can use the Find feature in the text editor like always.
 Speak Easy Bypass
Step 9- Now you need to search for the following
G__speak_easy_enabled
and change the value from ‘false’ to ‘true’.
 Speak Easy Enabled
Step 10- Lastly, Open your phone Settings, navigate to apps and select “Phone”. Then Force stop it.
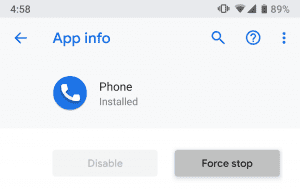 Phone App
…and there you have it. Google Pixel 3 call screening settings will be available under your “Google Phone” settings.
let us know in the comments if this method worked for you or if you have any questions.