
Here we will go through all the steps to install stock recovery on OnePlus 6 successfully.
OnePlus 6 is the latest flagship phone in the market operating on Oxygen OS 5.1 with Qualcom Snapdragon 845 (2.8GHz), 20M+16M dual camera supporting OIS & EIS and a 19:9 Full Optic Screen, wide display of 6.28 inches. OnePlus 6 also offers many features such as face unlock, fingerprint unlock, slow-mo cam and for the first time a completely hands free Alexa. With all these features and a lot more, OnePlus 6 is a dream phone of any android user.
Install Stock Recovery on OnePlus 6 using your PC or Mac
OnePlus has confirmed that the warranty of OnePlus 6 will not go void if it is rooted but if you like to get OTA updates you can unroot your device through stock recovery. Many developers are now opting to buy OnePlus 6 for the very purpose of development.
To install stock recovery on OnePlus 6 all you have to do is follow these steps
Requirements to Install Stock Recovery on OnePlus 6
Hardware:
- A laptop computer or PC.
- Perfectly operating USB cable.
- A minimum of 70% battery charge available in your device.
Software:
- Latest version of OnePlus USB drivers installed.
- Install ADB and Fastboot Tools on your Mac, Windows or Linux PC.
- OnePlus 6 Stock Recovery (Download form below).
Download OnePlus 6 Stock Recovery:
You can download OnePlus 6 stock recovery for your phone using the link available below. Note: Recovery is not available but once it is we will update the link below.
Installing Stock Recovery on OnePlus 6: Step by Step Tutorial
- Open the ADB command window on the PC or Mac. If you don’t have it follow the guide above in Software Requirements.

- Shut down the device and enter into Fastboot Mode manually.
- Do this by first completely Turning Off your Phone and then holding down the Power Button + Volume Up Button.
- Alternatively, if you have Advanced Reboot enabled on your device you can go Reboot > Bootloader from power menu.
- Once your phone is Fastboot, connect it to your computer.
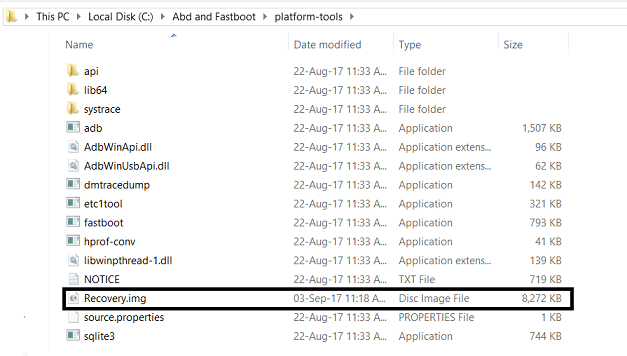
- Make suer you have copied “recovery.img” in ABD / Fastboot Tools folder.

- Open the ADB shell through these commands.
flash_image recovery recovery.img
- Reboot the device using the below command. If a warning sign appears then reboot the device again.
fastboot reboot
- After restart your device will use the original recovery to install update.
Do let us know in the comments below if you encounter any problems while following the guide.